Wednesday, March 23, 2016

Turning the Tables


The dining table is the place in our home that is the gathering place, where we laugh and eat and play games! But while shopping for one we found just how expensive that essential piece of furniture really is and set out for a cheaper alternative! We achieved a beautiful, stylish look from a second-hand, super basic pine table and we totally love it!! The entire project was done in one weekend and we spent less than $100 on the whole thing.

Step 1: Find It. Find a basic, inexpensive (or free) table and chairs set. Craigslist, thrift stores, garage sales and relatives' garages are all awesome places to find these. Keep in mind, it is easier to do a wide variety of finishes if you begin with a lighter color surface. It is more difficult to find finish options with a dark starting wood.

Step 2: Sand It. This step is vital! Sanding completely and throughly will ensure that the stain and paint adhere well and saturate the surface fully. On the table top, we found it easiest to use a palm sander. Sand paper will work if you don't have any sanding power tools, it will just take longer. I don't recommend a belt sander unless you are experienced with one. They are very powerful and can leave gouges in the surface! Trust me, I learned the hard way ;). For the rest of the table and the chairs I used my trusty, go-to 3M 150 grit flexible sanding sheets. Though more expensive, these are more flexible than regular sand paper and last much longer. Ensure any and all shine is removed from every surface and sand out as many stains or damaged spots as you can (especially if it is a second-hand table).

Step 3: Dust It. Dusting is usually the step I forget. And I always regret it when I do. Dusting and removing all the debris left from the sanding process is so important to the finished product! Please don't be like me. Please always dust your sanded projects! :)

Step 4: Stain It. For the table top of our set, we decided to go very dark. We wanted a huge contrast between the table top and the white we planned to use for the rest of the set. So we chose a stain called 'Red Mahogany' by Minwax. This gave a really deep, rich color as the focal point of our project. Be sure to remove the table top from the legs before this process so you don't spill any stain where you don't want it (especially if you're as messy as I am). We left it on for the first coat and had a lot of back-tracking to do. I prefer to always do at least two applications to staining projects to guarantee full coverage. You can really use anything for the table top though. You can do the entire set the same color, use a colorful paint for the top, or even chalk paint!

Step 5: Paint It. As I've said in other posts, I prefer spray paint to traditional paint in many projects and the same held true here. I found I was far easier to get the paint in all the nooks and crannies of the chairs in spray form. If you have a paint sprayer, great! If not, though, I recommend a semi-gloss spray paint. We used about six cans of spray between the two coats for the four chairs and table legs. Be sure to allow the specified cure time (usually 24 hours) between paint coats.

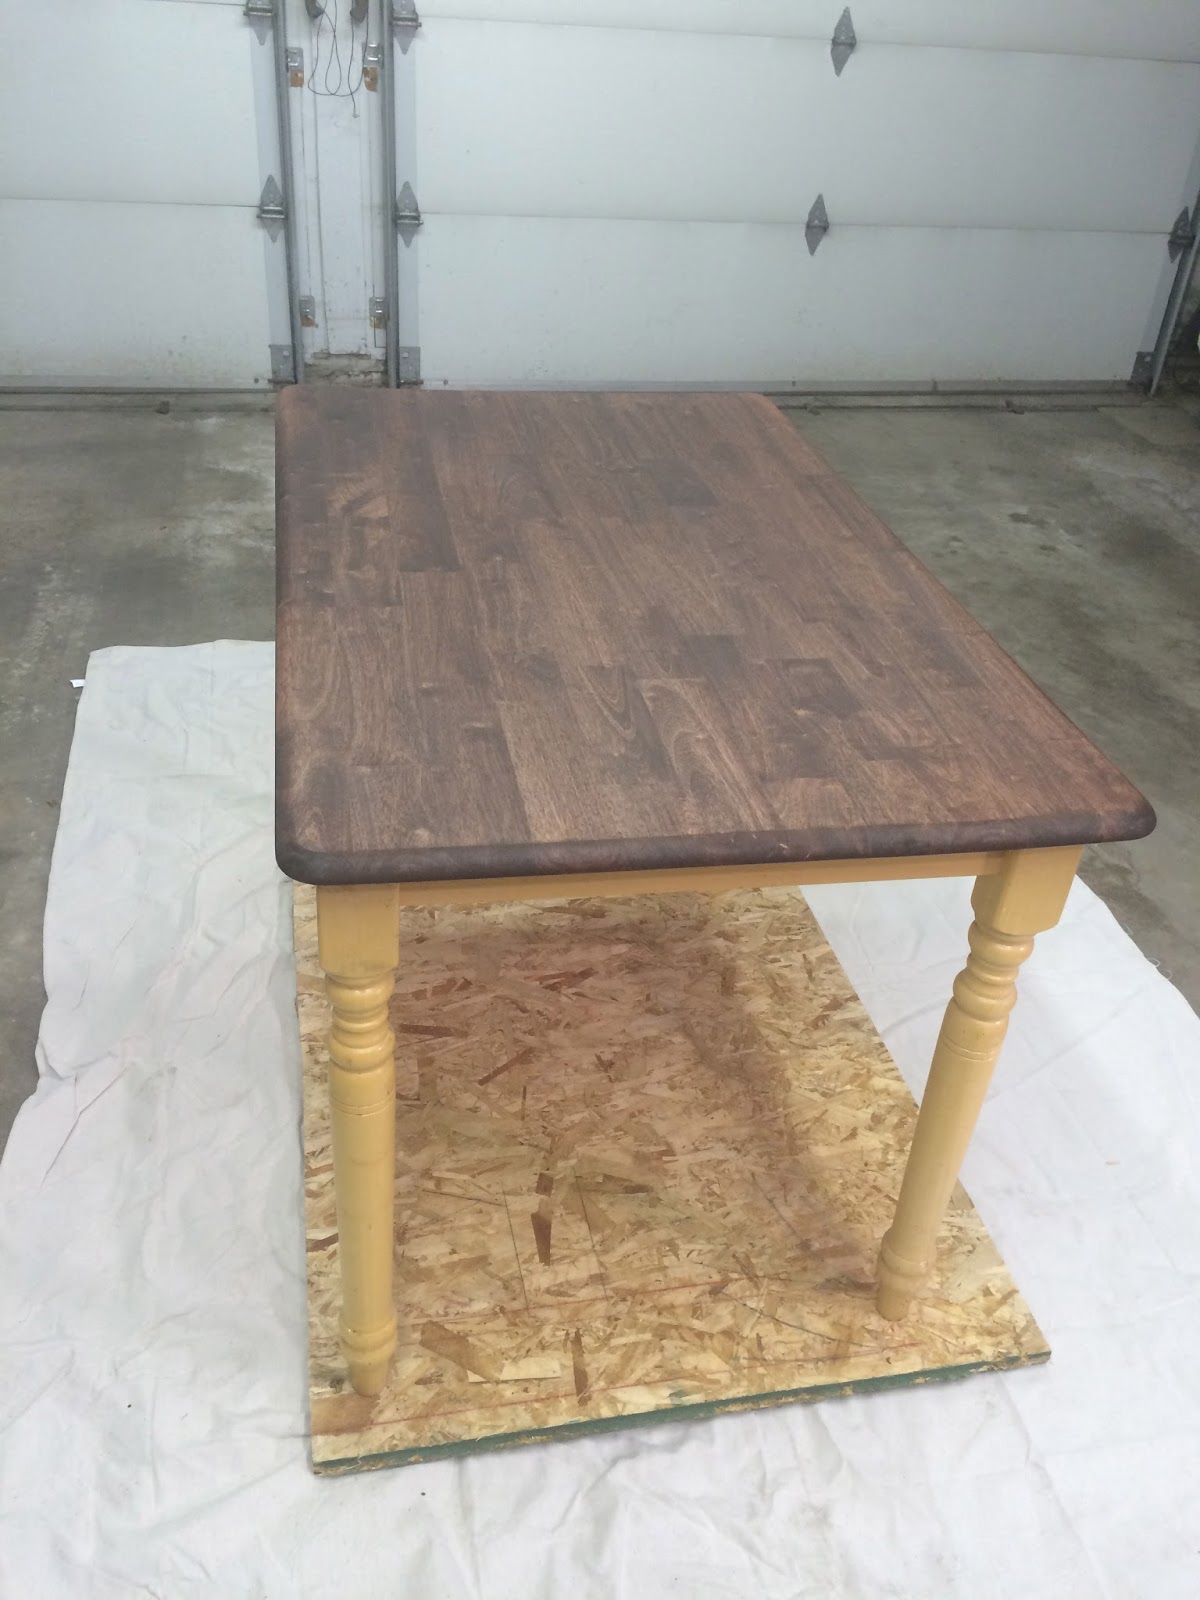
Step 6: Seal It. Table tops get a lot of abuse. Between spilled drinks, hot food, utensils, and games, the table needs to be able to hold up to anything. We used Minwax Polyurethane and did four coats! Use a high quality paint brush designed for oil based products. Apply the product in long strokes from end to end in the direction of the grain. After each coat had dried, give it a light sanding and dust it before applying the next. Don't sand the final coat. It seems excessive, I know, but the wood soaks up quite a bit and then you need a few coats on top of that in order to cover most imperfections in the wood. It makes it hardy and beautiful.

Step 7: Build It. After everything is dry and ready, put everything back together.

Step 8: Fab It. Put whatever pretty things you want on it! If you are majorly crafty, make some seat cushions for the chairs! This makes it even more personal to your style and your space. I am not crafty with fabric so I bought seat cushions from a home decor store to add a little extra to it. :)


Now show it off :). You worked hard, you deserve to sit back and enjoy your handiwork.


** Remember that chemicals found in paint, stain, and polyurethane can be harmful. Always use these products outside or in a well ventilated area :)

Tuesday, March 1, 2016

The Secret to Dry Shampoo

Just a short post today because this changed my life. I don't know about you but, personally, I will do anything and everything to get an extra day out of my hair before having to wash it. I can usually get about three wearable days and one messy-bun day before needing a shampoo. So when dry shampoo came on the scene, I was beside myself.

I tried so many different dry shampoo products and none of them really did anything for me. They left my hair still dirty but with white powdery residue. I could not figure out what I was doing wrong. Then a stylist friend of mine told me what I was doing wrong. Dry shampoo is not meant to actually do anything for dirty hair, but rather to keep clean hair cleaner longer. That's right. Dry shampoo is for CLEAN hair! (Insert shock and awe here)

So I went home and immediately washed and dried my hair. I sprayed my dry shampoo on as I normally would then did my makeup before brushing it through. And is felt the same as it would after any other fresh wash. But I repeated this process of styling and spraying for five days. FIVE. And each day my hair still felt super wearable! I was blown away by the results of such a simple and easy change.

So here's the 411 on dry shampoo:

  1. This is NOT a product you should skimp on. Professional hair care products are always better but especially in this arena. 
  2. You should follow the application instructions for your specific product. They are all slightly different. 
  3. Dry shampoo is supposed to extend the life of a wash, not replace a wash. 
  4. Dry shampoo is (I'm pretty sure) sent from heaven. 
  5. It is one of the best products I've found to help get volume. Just use it before you back-comb for that extra umph. 
If you already knew this, than I guess I'm just late to the party. But if you didn't, then I hope this helps you! I wish someone had told me sooner!