Tuesday, April 19, 2016

Cute DIY Whiteboards


What You'll Need:
  • Picture frame. I had this one in my closet but thrift store frames are always available at a minimal cost.
  • Paper. I decided to use my favorite wrapping paper but any paper will work; cards, construction paper, printer paper, scrapbook paper, etc. 
  • Writing utensils.  You'll need a pencil (with an eraser), and marker. 
  • Cutting tool.  I prefer an x-acto knife for projects like this but scissors will work well also. 
  • Stencils. Letter stencils are useful if, like me, you are not confident with your handwriting. You can also use letter stickers to make the project go a little quicker. 
How To Do It:
Step 1: Choose It- Choose a frame perfect for your needs. I needed three small white boards and
lucked out that I had this frame sitting in my closet. This project is totally scalable. Get creative with your paper too. 

Step 2: Cut It- Take the front glass out of the frame and put it on your paper. Place that on top of cardboard or foam so you don't damage your work surface. Hold the glass down and use your X-acto Knife to trace the exact dimension you need. 


Step 3: Measure It- Put the paper back in the opening with the glass behind it. Trace lightly, in pencil, the exact space of the opening so you know what space you have to work with. 

Step 4: Trace It- Trace a straight line in pencil in your usable space for your title (if you are doing a title.) Then trace your stencils lightly, also in pencil, to make sure your design works. This may take a few tries. 

Step 5: Mark It- Use a fine point marker, my favorite is a Sharpie Fine Point Pen, to fill in the letters. Again, you can use stickers for this to save time but it will cost a little more. 

Step 6: Erase It- Once you have your letters filled in, erase all the pencil lines you can see. This will contribute to a polished finished product. 


Step 7: Display It-  I hope you put your cute, custom white board to good use :) 


Monday, April 18, 2016

Dress Up Your Dresser - on a budget


When I married my husband, we were blessed with one four-drawer dresser he had owned since childhood that was missing most of its hardware and had moisture rings all over the top. We didn't have the budget or space to upgrade. So we did what we do best and made what we already had perfect for us.

 
Here's what you need for a simple dresser upgrade:
Paint- we used eggshell finish latex paint and our dresser required less than a quart.
Sandpaper- because of all the flat surfaces, this is a great project for a belt sander or palm sander but if you don't have either of those, any sand paper (I prefer 150 grit) and a little elbow grease will do the trick.
Paint Brush- the best kind of brush is a high quality latex bristle brush, this will make the project much easier.
Hardware- get whatever handles make you happy, that fit the measurements of the holes made for the previous hardware (we didn't measure and got the wrong hardware at first)


Step 1: Sand It- Take the drawers out and sand the finish from all the surfaces.

Step 2: Dust It- Make sure to remove all the dust before you start painting or they will show up in your finished project.

Step 3: Tape It- This project doesn't need a ton of tape prep work. The only place we found should be taped is the inside of the drawers behind the hardware openings.

Step 4: Paint It- Do a light first coat on the drawer faces, and exterior of the dresser. Use long brush strokes from end to end with the grain just to lightly cover the surface. Using long brush strokes is vital to avoid marks in the finished project. Allow the first coat to dry completely before applying the second coat or it could remove some of the first coat. Apply a generous amount for the second coat; again using long brush strokes from end to end with the grain.

Step 5: Complete It- Allow it to dry before you add hardware. Then allow it to cure (required cure time can be found on the label) before reassembling.

Enjoy your new-to-you dresser :) 

Sunday, April 17, 2016

Mason Jar Budgeting

Intro
I don't know about you but budgeting has always been a difficulty for me and my husband. We would enter every new budget scheme with enthusiasm but would eventually fail. So we decided to go with the envelopes of cash method. But quickly found it was still too easy to splurge with envelopes of cash with us. So we thought we could do the cash method with something more difficult to carry in a purse or wallet. Enter jars. Everyone has a jar or something full of change right? So why not apply jars for budgeting?


The System
We didn't do jars for everything; just for the things we often splurge on. As a hair stylist, I had to add a jar for hair products which most people probably don't need. We already went grocery shopping every Sunday and decided to make that our cash withdrawal day. Every week we pull $20 for date night/eating out, $20 for gifts, $80 for groceries, $40 for everything else 'other' and $10 of 'fun money' for each of us per week.  This will just add up over time so sometimes we won't have a date night for a few weeks and then can splurge on an $80 date or buy steak if we have a few under budget grocery bills in a row. Tithe, rent, other consistent bills, and gas all still just come out of our checking account at their regular times. This will hopefully allow us to stick to our budget completely and continue to build up savings for the next phase of life.

The Project
This was a super simple and fun weekend project. We spent $0 on the entire thing :)

Step 1: Find Jars- We happened to have quite a few jars lying around but you can find jars pretty easily at any thrift store, dollar stores, and grocery stores. It wouldn't even need to be matching jars and could add to the art of the project if they were all different.

Step 2: Paint- Since these jars will be full of cash, we thought it best if they weren't clear. We happened to have some left-over latex paint from another project that we used and it worked well, but any kind of paint will work. Just put 6 or so spoonfuls of paint into the jar, roll it around so the paint covers the inside of the jar, pour out the excess, and allow to dry in a warm, dry place. If you have paint leftover from a bunch of projects, you could do several colors and make a super fun piece. This is also a fun thing to do with a boring glass vase.

Step 3: Label- We also had these cute label stickers so just made use of them. You could use chalk markers, permanent markers, or label stickers to do your jars. I've seen these used for herb gardens as well and it was oober cute.

Step 4: Display- We chose to hang ours but they would be super cute even just on a shelf. We used twine with a slip knot around the rim of the jar to be able to remove it easily. We also decided to hang it in our bedroom where we can have a reminder of our plan but without having jars of cash out for guests to see. And we put a reminder of what is truly important right there with them.


Wednesday, March 23, 2016

Turning the Tables


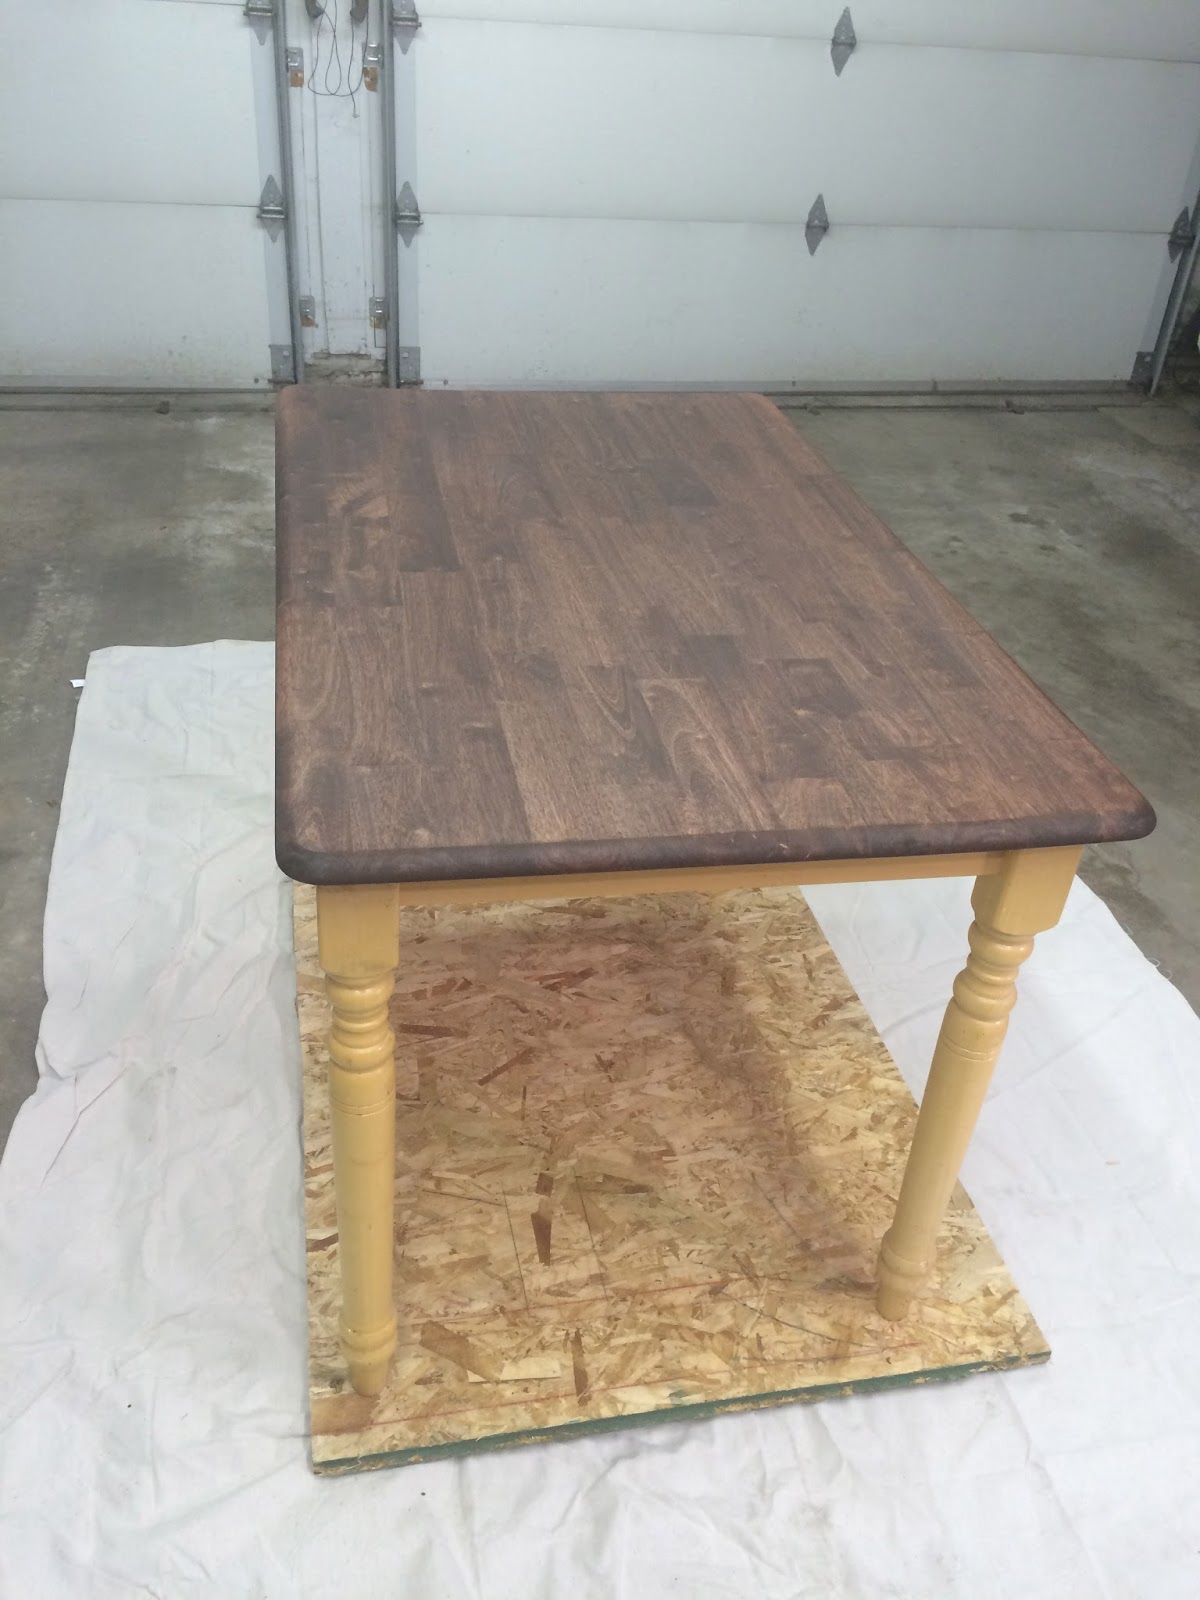
The dining table is the place in our home that is the gathering place, where we laugh and eat and play games! But while shopping for one we found just how expensive that essential piece of furniture really is and set out for a cheaper alternative! We achieved a beautiful, stylish look from a second-hand, super basic pine table and we totally love it!! The entire project was done in one weekend and we spent less than $100 on the whole thing.

Step 1: Find It. Find a basic, inexpensive (or free) table and chairs set. Craigslist, thrift stores, garage sales and relatives' garages are all awesome places to find these. Keep in mind, it is easier to do a wide variety of finishes if you begin with a lighter color surface. It is more difficult to find finish options with a dark starting wood.

Step 2: Sand It. This step is vital! Sanding completely and throughly will ensure that the stain and paint adhere well and saturate the surface fully. On the table top, we found it easiest to use a palm sander. Sand paper will work if you don't have any sanding power tools, it will just take longer. I don't recommend a belt sander unless you are experienced with one. They are very powerful and can leave gouges in the surface! Trust me, I learned the hard way ;). For the rest of the table and the chairs I used my trusty, go-to 3M 150 grit flexible sanding sheets. Though more expensive, these are more flexible than regular sand paper and last much longer. Ensure any and all shine is removed from every surface and sand out as many stains or damaged spots as you can (especially if it is a second-hand table).

Step 3: Dust It. Dusting is usually the step I forget. And I always regret it when I do. Dusting and removing all the debris left from the sanding process is so important to the finished product! Please don't be like me. Please always dust your sanded projects! :)

Step 4: Stain It. For the table top of our set, we decided to go very dark. We wanted a huge contrast between the table top and the white we planned to use for the rest of the set. So we chose a stain called 'Red Mahogany' by Minwax. This gave a really deep, rich color as the focal point of our project. Be sure to remove the table top from the legs before this process so you don't spill any stain where you don't want it (especially if you're as messy as I am). We left it on for the first coat and had a lot of back-tracking to do. I prefer to always do at least two applications to staining projects to guarantee full coverage. You can really use anything for the table top though. You can do the entire set the same color, use a colorful paint for the top, or even chalk paint!

Step 5: Paint It. As I've said in other posts, I prefer spray paint to traditional paint in many projects and the same held true here. I found I was far easier to get the paint in all the nooks and crannies of the chairs in spray form. If you have a paint sprayer, great! If not, though, I recommend a semi-gloss spray paint. We used about six cans of spray between the two coats for the four chairs and table legs. Be sure to allow the specified cure time (usually 24 hours) between paint coats.

Step 6: Seal It. Table tops get a lot of abuse. Between spilled drinks, hot food, utensils, and games, the table needs to be able to hold up to anything. We used Minwax Polyurethane and did four coats! Use a high quality paint brush designed for oil based products. Apply the product in long strokes from end to end in the direction of the grain. After each coat had dried, give it a light sanding and dust it before applying the next. Don't sand the final coat. It seems excessive, I know, but the wood soaks up quite a bit and then you need a few coats on top of that in order to cover most imperfections in the wood. It makes it hardy and beautiful.

Step 7: Build It. After everything is dry and ready, put everything back together.

Step 8: Fab It. Put whatever pretty things you want on it! If you are majorly crafty, make some seat cushions for the chairs! This makes it even more personal to your style and your space. I am not crafty with fabric so I bought seat cushions from a home decor store to add a little extra to it. :)


Now show it off :). You worked hard, you deserve to sit back and enjoy your handiwork.


** Remember that chemicals found in paint, stain, and polyurethane can be harmful. Always use these products outside or in a well ventilated area :)

Tuesday, March 1, 2016

The Secret to Dry Shampoo

Just a short post today because this changed my life. I don't know about you but, personally, I will do anything and everything to get an extra day out of my hair before having to wash it. I can usually get about three wearable days and one messy-bun day before needing a shampoo. So when dry shampoo came on the scene, I was beside myself.

I tried so many different dry shampoo products and none of them really did anything for me. They left my hair still dirty but with white powdery residue. I could not figure out what I was doing wrong. Then a stylist friend of mine told me what I was doing wrong. Dry shampoo is not meant to actually do anything for dirty hair, but rather to keep clean hair cleaner longer. That's right. Dry shampoo is for CLEAN hair! (Insert shock and awe here)

So I went home and immediately washed and dried my hair. I sprayed my dry shampoo on as I normally would then did my makeup before brushing it through. And is felt the same as it would after any other fresh wash. But I repeated this process of styling and spraying for five days. FIVE. And each day my hair still felt super wearable! I was blown away by the results of such a simple and easy change.

So here's the 411 on dry shampoo:

  1. This is NOT a product you should skimp on. Professional hair care products are always better but especially in this arena. 
  2. You should follow the application instructions for your specific product. They are all slightly different. 
  3. Dry shampoo is supposed to extend the life of a wash, not replace a wash. 
  4. Dry shampoo is (I'm pretty sure) sent from heaven. 
  5. It is one of the best products I've found to help get volume. Just use it before you back-comb for that extra umph. 
If you already knew this, than I guess I'm just late to the party. But if you didn't, then I hope this helps you! I wish someone had told me sooner!

Monday, February 22, 2016

Major Lamp Upgrade

Major Lamp Upgrade 

We all have a relative or two with a house full of old, metal lamps. You know the ones I am talking about, they are usually brass with some discoloration or chrome with some weird spots. And usually, those relatives want to give you all their antique stuff. While some people see it as an annoyance, I see it as AMAZING. These old lamps have such intricate and unique shapes and make for a beautiful 're-fab' project.

Step 1: Acquire It. Find an old metal lamp that you like the shape of. If you don't have any offered to you, thrift stores are absolutely full of them. Here is one of the lamps in the set we were given. As you can see, it is not the most appealing item in the world.

Step 2: Buff It. You can use any sandpaper for this. All you need to do is remove all the shine and smooth surfaces from the lamp. I've found it is easier to use flexible sand paper sheets. They are a bit more pricy than regular sandpaper but are easier to maneuver on non-box shapes and last far longer than the regular paper. You can find flexible sand paper at any hardware store and often at Wal-mart. I would recommend 3M 150 grit flexible sanding sheets but any brand will work.

Step 3: Dust It. This is a very important step. You must ensure that any and all dust from the sanding process is removed. Any residue left on the surface will show up during the painting process.

Step 4: Tape It. Use masking or painter's tape to tape everything you don't want to paint. Tape over any hardware and the chord. Make sure to tape the chord to at least six inches from the lamp to avoid any accidental paint. Put paper towel tightly in the light bulb socket to keep paint from getting into the area.

Step 5: Spray It. I have found that with most projects, spray paint is the best way to avoid paint lines in your work. Metal especially is very unforgiving when it comes to showing paint lines. When doing lamps, I prefer to use a matte finish spray. It makes the lamp appear to be intricate wood work rather than plastic or metal. You can find a wide selection of spray paint at all hardware stores. I absolutely LOVE working with Rust-Oleum for these projects.  It covers everything and is a paint and primer in one so it covers with less product.

  • Wear project clothes. Spray paint does just that, sprays. It will get on you. 
  • Spray the lamp outside! The fumes of this process can be harmful in a poorly ventilated environment. 
  • Hold the can about 6 inches from the lamp and spray in a horizontal motion all the way around and from top to bottom. Keep the spray moving at all times. If you leave the spray in one area too long, it will cause clumps or drips. Then spray vertically to ensure full coverage. You may want to have someone hold it upside down for you to ensure you get every inch. 
  • Let it dry for the required 'cure time' specified on the can (usually 24 hours) and then repeat the process.
Our project only needed two coats of paint per lamp and we used about one can per lamp. You may need more than two coats, it just depends on the project. 

Step 6: Fab It. Find lamp shades that you love to go with these lamps. We happened to have a Target gift card when we did ours so we found some there. I've found, however that Ross is usually the best place to find new, stylish lamp shades for usually under $10 each. 

Step 7: Show It. Display your work proudly! Just enjoy the looks on people's faces when they ask where you got your BEAUTIFUL lamps and you say, "I made them."


Thursday, January 7, 2016

Today, I Choose Joy

I've seen the 'today, I choose joy' quote everywhere lately. It seems that more and more people are realizing, either with maturity or cultural influence, that joy truly is a choice. We don't choose our circumstances, but we can choose how we respond.

In the past, I've responded with anger and sadness to the whirlwind of life around me. That just made things worse. When you give in to life and let it knock you down, things only tend to pile up on top of you until you are too overwhelmed and buried to do anything about it. You have to dig yourself up and out every day so you are ready for whatever comes next. You truly do have to choose joy.

Now, joy does not always mean happiness. Joy, to me, means contentment, kindness or peace. You don't have to walk around with a Barbie-stiff smile on your face. You just can't give in to the negative emotions trying to overtake you.
So how do we 'choose joy?'   
1. It's the little things.
Try to do little things that make you happy and bring you joy. Take a walk in the snow, lay out on the beach, take a bubble bath, treat yourself to some chocolate. Anything small that you can do to bring yourself joy, do it. A little thing like that can go a long way in destroying negative emotions.

2. Don't dwell.
Some circumstances must be dealt with and so you have to think about them all the time. But, once a situation or relationship is dealt with, move on! Our hurt will be there regardless, but if you keep picking at that emotional scar, it will get infected and take forever to heal. Be kind to yourself and let your heart heal.

3. Choose your company wisely.
We all have that one friend that needs all of our attention all the time. Be aware of that friend in your life. Be aware of how much emotional energy they sap from you. If necessary, rid yourself of that relationship. If the relationship is an important one to you, set emotional boundaries for yourself when interacting with that individual. Find friends who uplift you so you can choose joy together and grow.

4. Be different.
We live in a victim-mentality culture. Don't see yourself as a victim. See yourself as an overcomer. Yes bad stuff happens and yes life knocks you down sometimes but guess what, you're still here! So fight back! Teach life that you are stronger and that nothing will take your joy from you. Don't blame your problems on everyone else, we all tend to do that. Take responsibility for your own life and your own actions.

5. Trust God.
The final and most important, trust God. He's got you. We live in a fallen world and bad things happen here. He doesn't cause these things to happen but I guarantee He will bring something good from it. It's hard to see but He will. Trust that his plan for you is good. His plan is to prosper you and not to harm you. So trust him to see you through. Even if you can't choose joy sometimes, I know I can't always do it, trust Him to see you through. You'll make it to the other side, promise.